In today’s fast-paced digital world, the ability to scan documents on-the-go can be a game changer. For iPhone users, the built-in Notes and Files apps offer powerful tools to make this task a breeze. Whether you’re a student, a professional, or just someone who likes to keep things organized, knowing how to efficiently scan documents on iPhone can save you both time and effort.
This guide will walk you through the process of using your iPhone’s Notes and Files apps to scan documents, ensuring you can quickly and easily digitize important papers. From setting up for scanning to troubleshooting common issues, we’ve got you covered. Let’s get started!
Setting Up for Scan Documents on iPhone
Ensuring Your iPhone is Updated
First things first – make sure your iPhone is running the latest iOS version. Keeping your device updated ensures optimal performance and access to the latest features in the Notes and Files apps.
- Steps to Update iOS:
- Open the Settings app.
- Tap General.
- Select Software Update.
- If an update is available, tap Download and Install.
Regular updates fix bugs and improve the functionalities of apps, so don’t skip this step. It will keep your scanning experience smooth and hassle-free.
Preparing Your Environment
Before you start scanning, set up your environment to ensure clear and high-quality scans.
- Lighting: Good lighting is essential. Natural light is best, but if that’s not available, use a well-lit room. Avoid harsh shadows by diffusing direct light.
- Background: Use a solid, contrasting background to make your document stand out. A plain white or dark surface works best.
- Document Organization: Arrange your documents neatly. Remove any staples or paperclips that may interfere with the scanning process.
A well-prepared environment will help you achieve the best possible scan quality.
Scanning Documents with the Notes App
Accessing the Notes App
The Notes app is a versatile tool that comes pre-installed on your iPhone. Accessing its scanning feature is simple:
- Open the Notes app.
- Tap the Create New Note button (a square with a pencil).
- Tap the Camera icon above the keyboard.
- Select Scan Documents.
You’re now ready to start scanning!
Scanning Process
Scanning with the Notes app is straightforward. Here’s a step-by-step guide:
- Position your document within the camera frame.
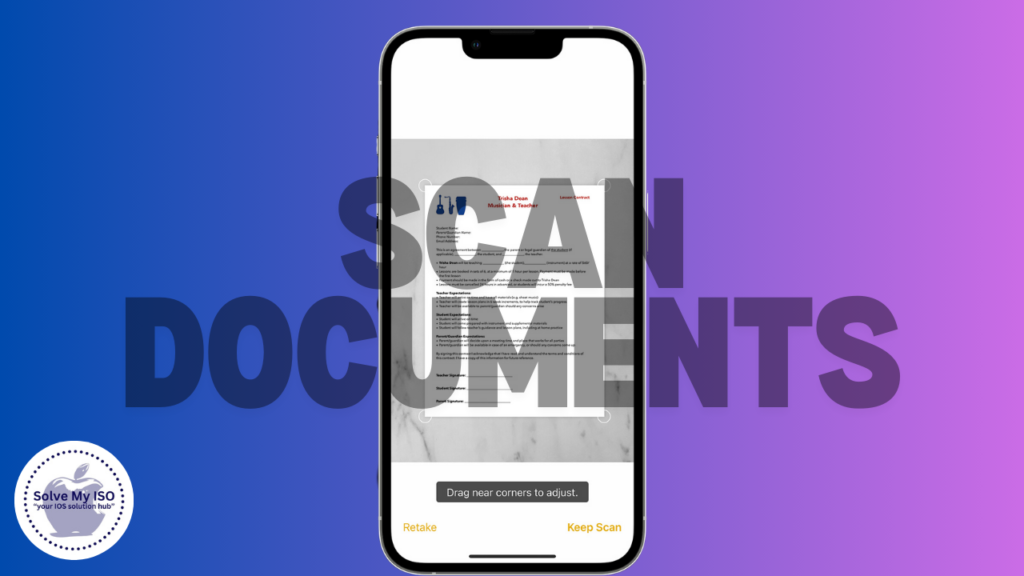
- The app will automatically detect the document edges and capture the scan. You can manually adjust the corners if needed.
- Tap Keep Scan to save the scan, or Retake if you’re not satisfied with the result.
- Repeat for additional pages, then tap Save when done.
Tips for High-Quality Scans:
- Hold your iPhone steady to avoid blurry scans.
- Ensure the entire document is within the frame.
- Adjust the edges accurately for a clean scan.
Managing Scanned Documents
Once you’ve scanned your documents, Notes offers several ways to manage them:
- Organize: Create folders to keep your scanned documents organized.
- Edit: Tap on the scanned document to crop, rotate, or apply filters.
- Share: Use the share button to email, message, or save the scanned document to other apps.
Keeping your scanned documents organized will make them easier to find and use later.
Scanning Documents with the Files App
Accessing the Files App
The Files app is another powerful tool for scanning documents. Here’s how to access its scanning feature:
- Open the Files app.
- Navigate to the location where you want to save the scan (e.g., iCloud Drive).
- Tap the three-dot menu in the upper-right corner.
- Select Scan Documents.
Now you’re ready to scan using the Files app!
Scanning Process
Scanning with the Files app is similar to the Notes app but with some added flexibility:
- Position your document within the camera frame.
- The app will automatically detect the document edges and capture the scan.
- Adjust the corners manually if needed.
- Tap Keep Scan to save, or Retake for another try.
- Continue scanning additional pages, then tap Save to finalize.
Best Practices for Using the Files App:
- Ensure good lighting and a contrasting background.
- Hold your iPhone steady.
- Use the manual adjustment tools for precise edges.
Organizing and Sharing Scanned Documents
The Files app provides robust options for organizing and sharing your scans:
- Store: Save your scans in specific folders for easy access.
- Tag: Use tags to categorize documents for quick retrieval.
- Share: Share scanned documents directly from the Files app via email, message, or other apps.
With these features, managing your scanned documents becomes a seamless experience.
Troubleshooting Common Issues
Scan Quality Problems
If your scans are blurry or unclear, try these solutions:
- Check Lighting: Ensure you have adequate lighting.
- Hold Steady: Keep your hand steady while scanning.
- Clean Lens: Wipe your iPhone’s camera lens to remove any smudges.
Improving scan quality is often just a matter of minor adjustments.
App Crashes and Bugs
If the Notes or Files app crashes or encounters bugs:
- Restart App: Close the app and reopen it.
- Update Apps: Ensure your apps are updated to the latest version.
- Restart iPhone: Sometimes a simple restart can fix issues.
If problems persist, consider reinstalling the app or contacting Apple Support.
Syncing Issues
If your scanned documents aren’t syncing across devices:
- Check Internet Connection: Ensure you have a stable internet connection.
- iCloud Settings: Verify that iCloud Drive is enabled.
- Manual Sync: Go to Settings > [your name] > iCloud > Files and toggle the switch off and on.
These steps should help resolve most syncing issues.
Advanced Tips and Tricks
Enhancing Scans with Editing Tools
Both Notes and Files apps offer built-in editing tools:
- Annotations: Add notes or highlights to your scanned documents.
- Filters: Apply filters to improve readability.
- Crop and Rotate: Adjust the document dimensions and orientation.
Using these tools can make your scans more functional and professional.
Integrating Third-Party Apps
For added functionality, consider integrating third-party apps:
- Adobe Scan: Offers enhanced scanning and OCR capabilities.
- CamScanner: Known for its advanced editing and sharing features.
- Evernote: Great for organizing and tagging scanned documents.
These apps complement the Notes and Files apps, offering more robust scanning options.
Security and Privacy Tips
Keep your scanned documents secure with these tips:
- Password Protection: Use apps that offer password protection for sensitive documents.
- Two-Factor Authentication: Enable two-factor authentication for your Apple ID.
- Secure Storage: Store sensitive documents in secure locations like iCloud or encrypted folders.
Ensuring your documents are secure gives you peace of mind.
Conclusion
Scanning documents on your iPhone using the Notes and Files apps is a convenient and efficient way to digitize important papers. From setting up your environment to troubleshooting common issues, you now have all the tools and knowledge to make the most of these powerful features.
Ready to start scanning? Grab your iPhone and try out the tips and tricks shared in this guide. For more iPhone tutorials and tips, visit Solve My iOS and join our community of tech-savvy users.


