Are you tired of losing track of your Apple subscriptions? Do you often find yourself surprised by unexpected charges from the App Store? If so, you’re not alone. Managing and tracking all your Apple and App Store subscriptions can feel overwhelming, but it doesn’t have to be. This guide is here to help you take control, avoid unnecessary expenses, and make the most out of your subscriptions.
Understanding Apple and App Store Subscriptions
Apple offers a variety of subscription services, ranging from music and video streaming to news and fitness. These subscriptions can be categorized into two types:
- One-time Purchases: A single payment for permanent access to a service or app feature.
- Recurring Subscriptions: Payments made on a regular basis (monthly, yearly, etc.) to maintain access to a service.
Common apps and services that often come with subscriptions include Apple Music, Apple TV+, iCloud storage, and various third-party apps. By understanding the different kinds of subscriptions available, you’ll be better equipped to manage them effectively.
Setting Up Subscription Management
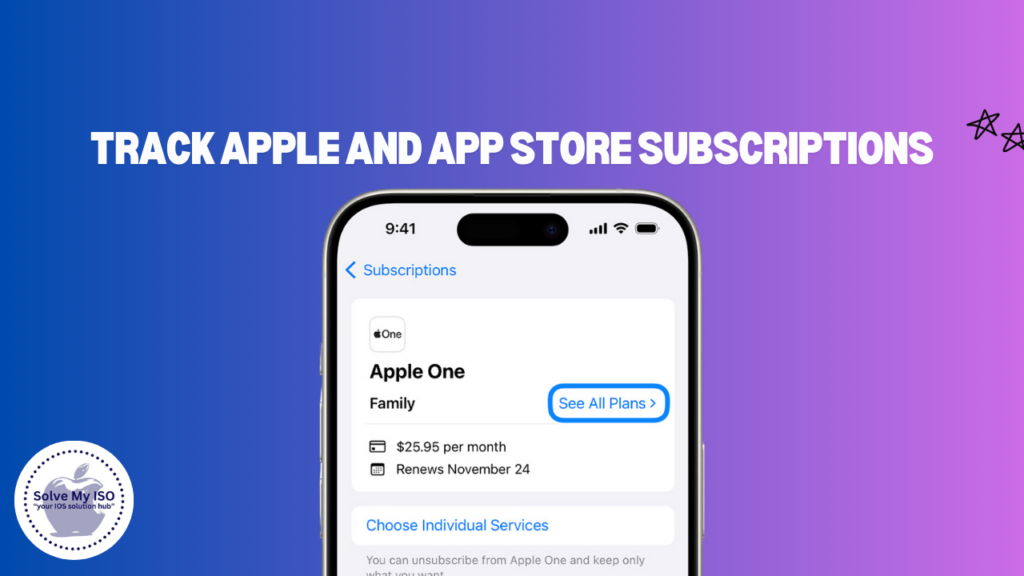
Managing your subscriptions starts with accessing your Apple ID settings. Here’s a step-by-step guide:
- Open Settings: On your iPhone or iPad, open the Settings app.
- Tap on Your Name: At the top of the screen, tap your name to access your Apple ID settings.
- Select Subscriptions: Tap “Subscriptions” to view and manage all your active and expired subscriptions.
To make managing easier, set up subscription notifications:
- Go to Settings: Open the Settings app again.
- Notifications: Tap “Notifications” and select the app for which you want to receive subscription alerts.
- Enable Alerts: Ensure notifications are enabled for subscription renewals and expirations.
Organizing your subscriptions can significantly reduce stress and save you time. Start by creating an easy-to-use spreadsheet or utilizing a notes app to log all your subscriptions. Be sure to include essential details such as renewal dates and costs. This simple approach provides a clear overview of your subscriptions, making it easier to manage and track expenses effectively. Stay on top of your finances by keeping your subscriptions organized!
Tracking Your Subscriptions
Apple provides built-in tools to help you monitor your subscriptions. Within the “Subscriptions” section of your Apple ID settings, you can see the renewal date, cost, and status of each subscription.
For more detailed tracking, consider using third-party apps such as:
- Bobby: An app designed specifically for tracking subscriptions.
- Truebill: Offers features for managing and canceling subscriptions.
- Trim: Helps you identify and cancel unwanted subscriptions.
Setting reminders for renewals and expirations can also be immensely helpful. Use your calendar app to set up alerts a few days before each subscription renews, giving you time to decide whether you want to keep or cancel it.
Managing Subscription Costs
Subscription costs can add up quickly. Regularly review and evaluate the necessity of each subscription to avoid unnecessary expenses. Ask yourself:
- Do I use this service regularly?
- Can I find a cheaper alternative?
- Is there a free version available?
If you identify any unused or unwanted subscriptions, cancel them promptly through your Apple ID settings. Simply tap on the subscription, then select “Cancel Subscription.”
Budgeting for subscriptions can help you keep your overall expenses in check. Set a monthly limit for subscription services and stick to it. This will prevent impulse purchases and ensure you’re only paying for what you actually use.
Family Sharing and Subscriptions
Apple’s Family Sharing feature allows you to share subscriptions with family members, making it easier to manage and reduce costs. Here’s how it works:
- Set Up Family Sharing: Go to Settings, tap your name, then select “Family Sharing.” Follow the on-screen instructions to set it up.
- Add Family Members: Once Family Sharing is set up, you can add family members who can then access shared subscriptions.
Managing shared subscriptions effectively involves regular communication with your family members. Make sure everyone is aware of the shared services and encourage them to use them responsibly.
Dealing with Subscription Issues
Common issues with subscriptions can include failed payments, subscriptions not appearing in your list, or unauthorized charges. Here’s how to resolve them:
- Failed Payments: Ensure your payment method is up to date in your Apple ID settings.
- Missing Subscriptions: Refresh the “Subscriptions” page or restart your device.
- Unauthorized Charges: Contact Apple Support immediately to report and resolve unauthorized charges.
If you encounter any persistent issues, don’t hesitate to reach out to Apple Support for assistance. They can help you troubleshoot and resolve any subscription-related problems.
Maximizing Subscription Benefits
To get the most out of your subscriptions, take advantage of all the features and benefits they offer. Look for discounts and offers, such as:
- Bundle Deals: Apple One bundles multiple Apple services at a discounted rate.
- Student Discounts: Many services offer discounts for students.
Utilize subscription features such as offline downloads, family sharing, and personalized recommendations to enhance your experience. By fully exploring these benefits, you can make the most out of every subscription.
Conclusion
Managing and tracking your Apple and App Store subscriptions doesn’t have to be a daunting task. By following the steps outlined in this guide, you can take control of your subscriptions, avoid unnecessary expenses, and enjoy the full benefits of the services you love. Start today and take charge of your subscriptions for a more organized and cost-effective experience.
For more tips and resources on managing your Apple devices, visit Solve My IOS.


